Introduction
Important: this post follows the part 2 of this series.
In this post we’ll see how to use our TypeScript project to develop a JavaScript Web resource that can add logic to an HTML Web Resource. You should see the benefits of what we already have in place in this project.
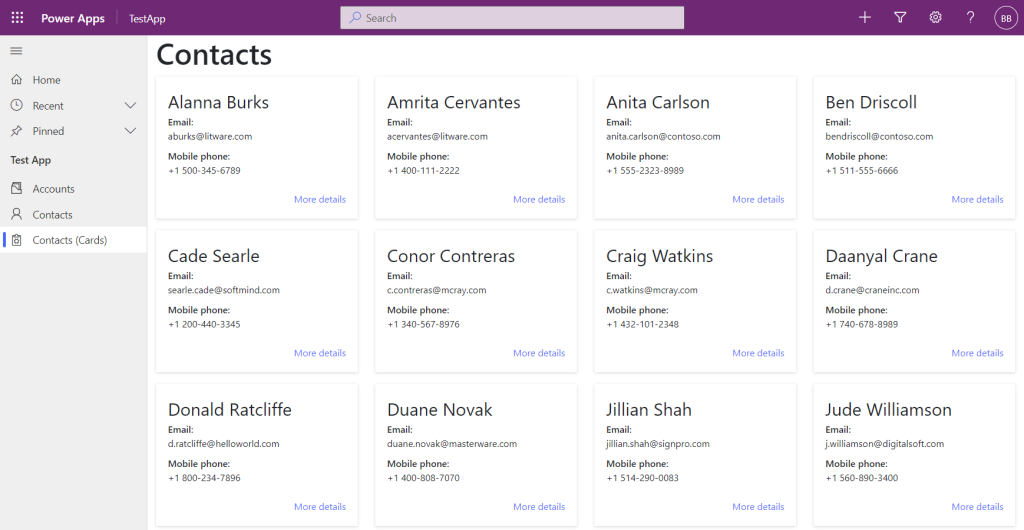
As an example we’ll develop an HTML Web resource that will display a table’s records as cards. Note that this would be a perfect use case for a PCF control but they are still some cases where a Web Resource can be useful (like creating an home page for a Model-Driven App).
The XRM definition files will ease the development of the data retrieval and React will be used to render the components.
The code of the sample project can be found here.
Creating the HTML Web resource
Let’s create a www_contactcards.html file in ./src/contact with the following content:
As you can see this is a very simple HTML file. What’s important here are the references to the www_contactcards.js and www_contactcards.css web resources that we’ll create soon.
Adding React
Since we already have a package manager (npm), a bundler (webpack) and a compiler (TypeScript) installed and configured we’re one step away from having a fully functional React project.
All we have to do is installed react:
npm i react react-dom
npm i --save-dev @types/react
Then we’ll have to activate the support of .tsx files with TypeScript. We’ll update the tsconfig.json file to add the jsx option in the compilerOptions object:
{
    "compilerOptions": {
        "jsx": "react",
        "outDir": "dist",
        "target": "ES6",
        "moduleResolution": "node"
    },
    "include": [
        "src/**/*"
    ]
}
Note: if VS Code still throws an error saying the –jsx flag must be enabled when editing the .tsx file (next section) just restart VS Code and that should fix it.
Adding the React components
Now it’s time to create the components that will be used to render our web resource. First we’ll add a contactCard.tsx in ./src/contact with the following content:
That file contains the code of the React component that displays a contact. Notice how we can access the Xrm object by using parent.Xrm. Some of you may say we need to be careful about how we access Xrm since some methods are now deprecated. Although that is true especially when developing JavaScript web resources that are registered in a form, calling parent.Xrm is still supported as stated by Microsoft in the context of an HTML web resource:
Although Xrm.Page is deprecated, parent.Xrm.Page will continue to work in case of HTML web resources embedded in forms as this is the only way to access the form context from the HTML web resource.
learn.microsoft.com
Now it’s time to create the www_contactcards.tsx file that will contains the logic to retrieve the data and use the contactCard component. That file will be transpiled to the www_contactcards.js file that is referenced by www_contactcards.html. We’ll add the file in ./src/contact with the following content:
As you can see this it’s a simple functional component that retrieves the data thanks to Xrm.WebApi and uses the contactCard component we created to display the contacts.
Doing it with style
Although our web resource is functional it wouldn’t look good if we decided to upload it without adding a bit of CSS. We’ll add a www_contactcards.css file in ./src/contact with the following content:
Updating webpack.config.js
Since our www_contactcards.tsx file is directly referenced by www_contactcards.html instead of being a module imported in crm.ts, we have to define it as a new entry point in webpack.config.js:
...
  entry: {
    www_crm: './src/crm.ts',
    www_contactcards: './src/contact/www_contactcards.tsx'
  }
...
Building and testing
Let’s build our project by running npm run build. That should generate a www_contactcards.js file in ./dist that we can upload as a new web resource in our Dataverse environment.
We’ll also have to upload ./src/contact/www_contactcards.html and ./src/contact/www_contactcards.css as web resources. Make sure you use the filenames as web resource names to ensure references between the HTML, JS and CSS files are still valid.

Finally we can insert our web resource in a form, a dashboard or create a link in the site map pointing to it. I’ll use this last option to display the web resource as a full page.
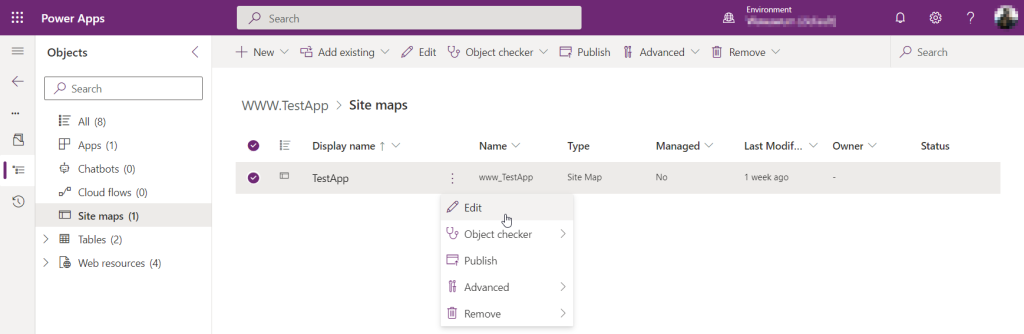
Then add a sub area, select “web resource” as type and select the www_contactcards.html web resource.

After saving the site map and publishing all the customizations you should be able to see the new navigation item and display the web resource:
Conclusion
A unified approach
What we did is not far from creating a PCF when you think about it. We used TypeScript to ease the development, webpack to bundle our code with third-party libraries and we rendered our component with React. Of course our component is running in a different context since it’s a web resource but the development stack is identical to the development of a PCF control.
I would encourage you using this approach since you’ll get a very familiar experience developing web resources or PCF controls.
Things to consider and improve
I tried to keep this series of posts as short and easy to understand as possible but that obviously comes with some shortcomings. For example in a real world scenario I would add sass to the project and transpile scss file to css. It’s easy to configure and will greatly ease the CSS development.
Another thing I usually do is add the copy-webpack-plugin package to the project and configure it to copy the .html files to the ./dist folder (I don’t need to copy the css files since they can easily be generated in the right folder when using sass). I do that to avoid having to browse multiple folders when manually uploading the web resources.
Finally you may want to build the project in a Azure DevOps pipeline and integrate the generated files into a solution automatically. This way the developers would only have to commit their changes to a git repo to integrate their changes and deploy them to any given environment. Although this is technically feasible I prefer to stick with the good old manual upload to a development environment, then extract the solution and push it to staging and production environments thanks to an Azure pipeline. It really depends on your team’s and project’s size. You may want to use the WebResources Manager plugin of Xrm Toolbox to ease the manual update of generated web resources.